
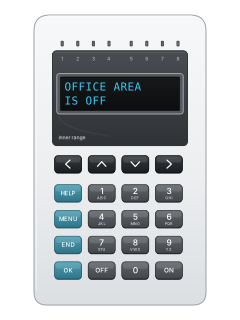
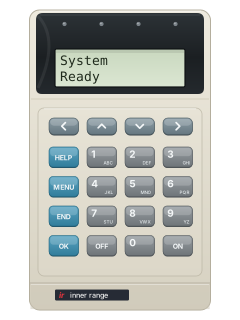
EliteX LCD terminal
Inner Range Inception manuals
Start hereInception User ManualUser guide · 19 pages · 1.6 MBRead it nowKeypad cheat sheet
Arm (away)your codeONoryour codeOKMENU0ONArmyour codethe key with a tick on it
- Elite/EliteX: if your installer linked an area for quick control, enter your PIN and ON. Otherwise use PIN, OK and the area menu below.
- Otherwise key in your PIN and press OK. If the area screen doesn't open, press MENU, then 0.
- Pick the area with the up and down arrows, then press ON. 'Area Armed, Exit Area Now' shows: leave by your exit path.
- 'Arm Failed' lists what's unsealed, such as a door left open. Fix it and try again.
- Touchscreen: tap Arm below the area, enter your PIN and tap the tick. Leave before the on-screen exit countdown ends.
Arm while homeArm - Nightyour codethe key with a tick on it
- Touchscreen only, if multi-mode arming is set up: Night arms the chosen night zones; Perimeter arms outside zones. Elite/EliteX: see its own guide.
- Tap the down arrow beside Arm - Full, select Night, then close the window with its X.
- Tap Arm - Night, enter your PIN and tap the tick. Choose Perimeter instead if that is the mode you need.
Pages 4 and 5 of the Inception Touchscreen User Guide V2.0Night Arms the zones set for Night mode Perimeter Arms the perimeter while leaving interior zones off Disarmyour codeOFForyour codeOKMENU0OFFDisarmyour codethe key with a tick on it
- Elite/EliteX: come in by your usual entry door and disarm before the entry time ends. Touchscreen instructions are below.
- Quick control, if set up: key in your PIN, then press OFF instead of OK.
- Or key in your PIN and press OK (then MENU, 0 if needed). At 'In Entry Mode. Press OFF to Disarm', press OFF.
- Disarming also stops the sirens after an alarm. Press END to log off.
- Touchscreen: during the entry time the PIN pad opens by itself. Key in your PIN and tap the tick. Otherwise tap Disarm first.
Bypass a zoneyour codeOKMENU34thenOFF
- Elite/EliteX: bypassing is called isolating an input. The input is then treated as secure. Touchscreen instructions are below.
- Log on with your PIN and OK, then press MENU, 3, 4.
- Scroll to the input with the up and down arrows. Press OFF to isolate it, or ON to put it back.
- It stays isolated until someone puts it back, so undo it once the detector is fixed.
- Touchscreen: open Sensors using the sensor symbol beside the arm/disarm button, then tap Bypass beside the required sensor.
Alarm memoryyour codeOKMENU12the key with a bell on it
- Elite/EliteX: enter your PIN, OK, MENU, 1, then 2 for security events (or 1 for all events). Touchscreen instructions are below.
- Scroll one event at a time with the up and down arrows.
- After an alarm, a message with an alarm summary may be waiting and open when you log on. Press OK to acknowledge it.
- Touchscreen: tap the bell at the top left to see alarms, then acknowledge them.
Panic alarmEmergencyRequest Help
- Touchscreen only, if set up by your installer: tap Emergency at the bottom right. For Elite/EliteX, see its own guide.
- For a police help request, tap Request Help beside Police. Fire and Ambulance are separate choices.
- Slide the bar to the right to confirm, or tap Cancel if it was a mistake.
- Confirming sets off a local alarm, including any sirens, and can alert your monitoring company.
Pages 13 and 14 of the Inception Touchscreen User Guide V2.0Request Help Choose the service before confirming Slide bar Slide right to confirm the selected help request Change a codeyour codeOKMENU21new codeOKnew codeOK
- Elite/EliteX: log on with your PIN and OK, then press MENU, 2, 1.
- Key in the new PIN (2 to 8 digits, unless your installer changed that) and press OK.
- Key it in again to confirm, then press OK. 'User PIN Changed' shows.
- Adding users or changing someone else's PIN is done in the web interface: Configuration > Users > Manage Users.
- For changing a PIN on the touchscreen, see its own guide.
Set the date and time
- Inception can set its clock from an internet or local NTP server, if configured and reachable. Daylight saving follows its time-zone settings.
- The clock is only set in the web interface, not at the terminal. Log in and go to Configuration > General > Date and Time.
- Press the Set Date/Time Manually button, set the date and time (or use your browser's), then press OK.
Page 17 of the Inception User ManualAt a terminal or touchscreen Use the web interface to set the controller clock NTP configured and reachable The controller synchronises its clock No reachable NTP server Set the clock in the web interface Trouble messagesyour codeOKMENU61
- Elite/EliteX: warnings are current problems; messages describe past events. Ask your installer about warnings. Touchscreen instructions are below.
- Log on: the warnings and messages screen may open by itself. If not, press MENU, 6, 1.
- Left and right arrows switch between Messages and Warnings. Press OK to acknowledge a message.
- Touchscreen: open Health using the symbol left of the arm/disarm button to see hardware problems, as in the table.
- Beeping near a door can mean it was held open too long, if your installer set that up. Close it properly, or it may be reported as an alarm.
Pages 8, 13 of the Inception User ManualPages 3, 9 and 10 of the Inception Touchscreen User Guide V2.0Offline A module isn't talking to the controller No AC Mains power is off: running on the backup battery Low Battery The backup battery is low Battery Missing No backup battery found Isolated That hardware has been isolated to stop further alarms
Why is my keypad beeping or showing a trouble light?
Most keypads beep or light up a trouble indicator when something needs attention, such as a low backup battery, a power cut or a lost phone or internet connection. Your user guide explains what each light or code means on your model. If it keeps happening, or you are not sure, call your installer or monitoring company.
All Inner Range Inception manuals
User guides 2
Installer manuals 28
Nothing here matches that.
Try a shorter search, or search every brand.
More Inner Range models
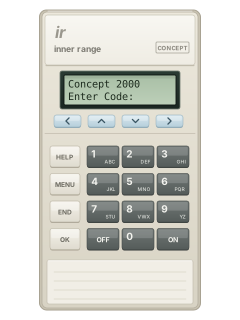
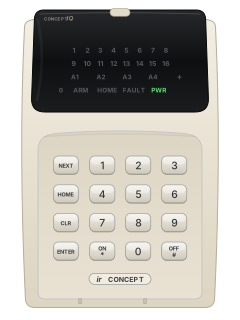
Is anyone watching your alarm?
An alarm that only makes a noise relies on someone hearing it. A monitored alarm reports to our A1 graded, NZSA approved control room, watched 24/7 by a team that is New Zealand owned and operated. We can monitor most existing alarms, so you may not need a new one. Thinking about a new alarm or security cameras? Ask us for a quote.
Prefer to talk now? Call us on 0800 339 999.
Home: alarm monitoringBusiness: business monitoringInstaller: bureau monitoring

Manuals are the property of their manufacturers and are provided for reference only; their inclusion here does not imply any endorsement by the manufacturer.