
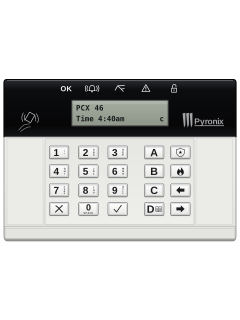
PCX-LCDKeypad
Pyronix PCX 46 manuals
Start hereRINS1604-3 PCX 46 User Manual V9.26User guide · 32 pages · 3.0 MBRead it nowKeypad cheat sheet
Arm (away)your codethe key with a tick on itthe key with a tick on it
- Key in your code and press the tick key. Arm Areas shows.
- To leave an area out, press its key (0 to 3, A to D), if your code allows area choice. Then press tick.
- If the display shows Arming Wireless, press tick again. Arming then shows with the exit time counting down: leave.
- Changed your mind? Key in your code during the exit time: Stop Arming? shows. Press tick.
- With a tag, present it at the tag symbol instead of keying in a code. With a keyfob, press its arm button.
Disarmyour codethe key with a tick on itthe key with a tick on it
- Key in your code and press the tick key, or present your tag. Disarm Areas shows.
- To keep an area armed, press its key to deselect it, if your code allows area choice.
- Press tick. The display shows the time again: the system is disarmed.
- With a keyfob, press its disarm button.
Bypass a zoneDmaster code
- Pyronix calls zones inputs. Bypassing one ignores it, and its tamper alarm, for the current arming.
- Press D (BYP), then key in the master code. At BYPASS INPUTS?, press tick.
- Key in the input number, 01 to 46, and press tick. The display shows that input.
- Press the cross key to move on, then A to leave the menu.
- Entry-delay and panic (PA) inputs can't be bypassed.
Alarm memoryDmaster code
- Press D and key in the master code. Press the cross key until REVIEW LOG? shows, then tick.
- At Panel Log? press tick. An event shows with its date and time, such as Alarm Silenced.
- Press tick to step through the events to Start of Log. C gives more about an event, such as which user.
- Press the cross key until REVIEW LOG? shows again, then A to leave the menu.
Chime on or offC
- Chime sounds when an input opens. Your installer chooses which inputs chime.
- Close all doors. When a small c shows on the display, press C. A capital C shows, and chime works on any other keypads.
- Press C again to switch chime off altogether.
- Chime isn't advised on wireless movement detectors: it runs their batteries down.
Panic alarmhold1+7
- Your engineer must turn these on. Panic can be set up as silent or audible.
- Hold 1 and 7 together for 3 seconds, or hold the key with the police badge for 3 seconds.
- Hold the key with the flames for 3 seconds for a fire alarm.
- A keyfob can also be set up for panic: ask your engineer.
Change a codeDmaster code
- Press D and key in the master code. Press the cross key until LEARN USER CODES KEYFOBS & TAGS? shows, then tick.
- Press tick at User Codes/Tags/Learn Keyfobs?. Choose the user number (Empty means no code yet) and press tick.
- Key in the new code and press tick (C there deletes that user's code). Tick through the settings that follow.
- Master code: at User Codes/Tags/Learn Keyfobs? press cross, then tick at Change Master Manager Code?. Key in the new code, tick.
- Change the factory master code if it's still set: your installer can tell you.
Set the date and timeDmaster code
- Press D and key in the master code. Press the cross key until DATE & TIME? shows, then tick.
- Key in the year (2 digits), then the month, day, hours (0 to 23) and minutes, pressing tick after each.
- Software Clock Adjust and Summer Time Adj come next: if you're unsure about them, ask your installer.
- Press the cross key to go back to DATE & TIME?, then A to leave the menu.
Test the systemDmaster code
- Press D and key in the master code. Press the cross key until WALK TEST? shows, then tick.
- At Walk Test Areas press tick to test the areas shown. Set off each input in turn, then press tick.
- To test one input, press cross at Walk Test Areas, key in its number and press tick.
- BELL TEST? is next in the menu: tick sounds the siren (Testing Bell...), and tick or cross stops it.
- Press the cross key until a main menu name in capitals shows, then press A to leave.
Trouble lights
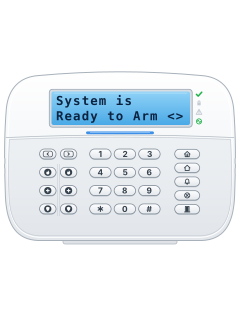
- The table is for the PCX LCD keypad's lights above the display: OK and four symbols.
- A keypad with a power light and lights 1 to 4 instead isn't in the PCX 46 guide: ask your installer.
- Alarm, tamper and fault messages clear from the display within 3 minutes. Press the tick key to clear one sooner.
- The panel log lists alarms and other events: see Alarm memory.
- A keyfob's light shows the system too: red armed, green disarmed, amber fault.
Pages 3 and 4, 13 of the RINS1604-3 PCX 46 User Manual V9.26Page 50 of the RINS1829-3 PCX 46 APP Installation ReferenceOK Ready to arm: every input is closed Alarm (bell) Shows alarms Tamper Shows tamper alarms Alert (triangle) A system fault, or something pending Disarm (open padlock) The system is disarmed
Why is my keypad beeping or showing a trouble light?
Most keypads beep or light up a trouble indicator when something needs attention, such as a low backup battery, a power cut or a lost phone or internet connection. Your user guide explains what each light or code means on your model. If it keeps happening, or you are not sure, call your installer or monitoring company.
All Pyronix PCX 46 manuals
User guides 1
Installer manuals 1
Nothing here matches that.
Try a shorter search, or search every brand.
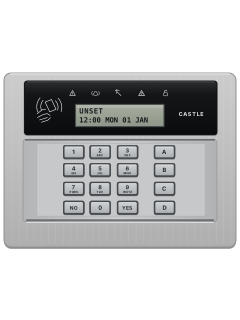
More Pyronix models
Is anyone watching your alarm?
An alarm that only makes a noise relies on someone hearing it. A monitored alarm reports to our A1 graded, NZSA approved control room, watched 24/7 by a team that is New Zealand owned and operated. We can monitor most existing alarms, so you may not need a new one. Thinking about a new alarm or security cameras? Ask us for a quote.
Prefer to talk now? Call us on 0800 339 999.
Home: alarm monitoringBusiness: business monitoringInstaller: bureau monitoring

Manuals are the property of their manufacturers and are provided for reference only; their inclusion here does not imply any endorsement by the manufacturer.