

DMP XR200 manuals
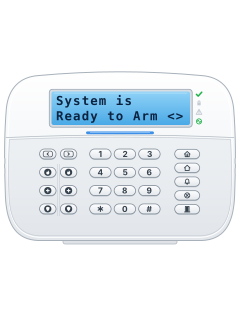
Start hereLT-0520 Users Guide XR200-485 ClassicUser guide · 50 pages · 208 KBRead it nowKeypad cheat sheet
Arm (away)
- The XR200 arms by areas. Press COMMAND until ARM DISARM shows, then the select key under ARM.
- If ENTER CODE shows, enter your code. At ALL? NO YES, select YES to arm every area your code allows.
- ALL SYSTEM ON (SYSTEM ON if only some areas) shows, then EXIT: with the seconds left to get out.
Pages 7, 10 to 12 of the LT-0520 Users Guide XR200-485 ClassicALL? NO YES YES: every area your code allows. NO: each area in turn, YES or NO. Or key in area numbers, then COMMAND ONE MOMENT The arming report is being sent LOCAL ALARM ONLY The arming report didn't get through Disarm
- Come in by an entry door: a prewarn tone sounds and ENTER CODE: shows.
- Key in your code and press COMMAND, then select YES at ALL? NO YES to disarm all your areas.
- Any alarms from while you were out show, then ALL SYSTEM OFF.
- Not in the entry delay? Press COMMAND until ARM DISARM shows and pick DISARM first.
- Alarm sounding? Key in your code and press COMMAND to silence it. ALARM CANCELLED shows if your system sends cancel reports.
Pages 2, 8, 12, 14 of the LT-0520 Users Guide XR200-485 ClassicALL? NO YES Press the select key under YES to disarm all your areas Bypass a zone
- Each detector or door contact is a zone. If one isn't normal when you arm, its name shows with OKAY BYPASS STOP.
- Fire, panic, emergency and supervisory zones can't be bypassed, and nor can a priority zone (BAD * on the display).
- Ahead of time, with a level 6 code or higher: press COMMAND until MENU? NO YES, select YES, key in your code, press COMMAND.
- Press COMMAND until BYPASS ZONES?, then any select key, and key in the zone number.
Pages 9 to 11, 13, 17 of the LT-0520 Users Guide XR200-485 ClassicOKAY BYPASS STOP BYPASS leaves out all the zones shown until you disarm. OKAY arms anyway: each rejoins once it's normal. STOP stops arming ZONE: - RST BYPS After the zone number, BYPS bypasses that zone and RST puts it back Alarm memory
- When you disarm, the keypad shows any alarms from while the system was armed.
- Later: press COMMAND until MENU? NO YES shows, select YES, key in your code, press COMMAND. Then COMMAND until ZONE STATUS?.
- Press a select key, then select ALR: the zones that went into alarm in this or the last armed period.
- DISPLAY EVENTS? in the menu lists past events: LST starts with the newest, and the ARROW key steps to older ones.
- On a 32-character display, a select key shows the zone number and type. A 16-character display shows these already; its right select key shows the time.
Pages 12 and 13, 16, 29 and 30 of the LT-0520 Users Guide XR200-485 ClassicALR, TBL or RST in an event An alarm, a trouble, or back to normal BURG, FIRE or PANC A burglary, fire or panic zone Chime on or off
- The XR200 calls chime Zone Monitor: LCD keypads sound a door bell chime and show a zone's name as it opens.
- With a level 4 code or higher: press COMMAND until MENU? NO YES, select YES, key in your code, press COMMAND.
- Press COMMAND until ZONE MONITOR?, then a select key. Select ALL, then ADD to watch all disarmed zones, or RMV to stop.
- It only works on disarmed zones. The name clears after a short time, or when the zone is armed.
Pages 8, 13, 18 of the LT-0520 Users Guide XR200-485 ClassicALL NBR ALL: every disarmed zone. NBR: one zone, by its number ADD RMV ADD puts those zones in Zone Monitor; RMV takes them out Reset smoke detectors
- Smoke and glassbreak detectors that tripped must be reset before they can detect again.
- Clear the smoke from around the detectors first, or the alarm starts again.
- Press COMMAND until MENU? NO YES, select YES, key in your code and press COMMAND. Then COMMAND until SENSOR RESET shows.
Pages 13 and 14, 17 of the LT-0520 Users Guide XR200-485 ClassicSENSORS OFF Power to the detectors is off for five seconds so they can reset SENSORS ON The reset is done; the keypad leaves the menu by itself Change a code
- You need a level 9 code. Press COMMAND until MENU? NO YES, select YES, key in your code and press COMMAND.
- Press COMMAND until USER CODES?, then a select key, then the select key under CHG. Key in the user number and press COMMAND.
- At CODE NO:, press a select key, key in the new code and press COMMAND.
- Codes are 3 to 5 digits, can't start or end with 0, and can't be 1 to 299 or 980 to 989.
- Keep or change the name and areas, pressing COMMAND after each. Choose LEVEL, enter the level, then COMMAND. USER # CHANGED confirms it.
Pages 13, 20 and 21, 23, 44 of the LT-0520 Users Guide XR200-485 ClassicADD DEL CHG BAT CHG changes a user's code; ADD or BAT (batch) adds users; DEL deletes one USER NUMBER: The user's number, not their code Set the date and time
- You need a level 8 code or higher. Press COMMAND until MENU? NO YES, select YES, key in your code and press COMMAND.
- Press COMMAND until TIME?, then a select key. The day and time show; COMMAND shows the date; COMMAND again to change them.
- At TIME DAY DATE, press the select key under TIME, key in the time and pick AM or PM.
- DAY picks the weekday (COMMAND shows THU FRI SAT). DATE asks MONTH, DAY, then YEAR: press COMMAND after each.
- Back at TIME DAY DATE, press the ARROW key to leave the menu.
Pages 13, 28 of the LT-0520 Users Guide XR200-485 ClassicTIME DAY DATE Press the select key under the part you want to change MONTH: DAY: YEAR: Up to two digits each, then COMMAND Test the system
- With a level 4 code or higher: press COMMAND until MENU? NO YES, select YES, key in your code, press COMMAND.
- Press COMMAND until SYSTEM TEST?, then a select key. The test starts by itself.
- The ARROW key ends the transmit test early.
- Weekly, follow it with Zone Monitor: open and close each door and window and listen for the keypad beep.
Pages 13, 18 and 19 of the LT-0520 Users Guide XR200-485 ClassicBELL SOUNDING A 2-second siren test BATTERY - OKAY or BATTERY - TRBL The battery's condition TRANSMIT OKAY or TRANSMIT FAILED The transmit test's result (local-only systems skip it) TEST END The test is finished Trouble lights
- A trouble sounds a steady keypad tone and shows TROUBLE with a description. Press a top-row select key to quiet it.
- Quieting the tone doesn't fix the fault. If there are several troubles, the keypad takes turns showing them.
- SYSTEM STATUS? in the menu lists AC POWER, BATTERY and TAMPER, each OKAY or TRBL. TRBL: call your alarm company.
Pages 6 to 9, 19 of the LT-0520 Users Guide XR200-485 ClassicPOWER light on Running on mains power POWER light off Mains power is off: the backup battery is running the system for now Armed light on (32-character keypad) At least one area is armed (zone name) - LOBAT That wireless transmitter's battery is low (zone name) - MISNG The panel isn't getting that transmitter's regular test report WIRELESS - TRBL Part of the wireless system isn't working properly SYSTEM TROUBLE or SERVICE REQUIRED A part of the system has a problem: contact your alarm company soon SYSTEM BUSY It's busy with a more important task: wait a moment
Why is my keypad beeping or showing a trouble light?
Most keypads beep or light up a trouble indicator when something needs attention, such as a low backup battery, a power cut or a lost phone or internet connection. Your user guide explains what each light or code means on your model. If it keeps happening, or you are not sure, call your installer or monitoring company.
All DMP XR200 manuals
Installer manuals 1
Nothing here matches that.
Try a shorter search, or search every brand.
More DMP models
Is anyone watching your alarm?
An alarm that only makes a noise relies on someone hearing it. A monitored alarm reports to our A1 graded, NZSA approved control room, watched 24/7 by a team that is New Zealand owned and operated. We can monitor most existing alarms, so you may not need a new one. Thinking about a new alarm or security cameras? Ask us for a quote.
Prefer to talk now? Call us on 0800 339 999.
Home: alarm monitoringBusiness: business monitoringInstaller: bureau monitoring

Manuals are the property of their manufacturers and are provided for reference only; their inclusion here does not imply any endorsement by the manufacturer.