
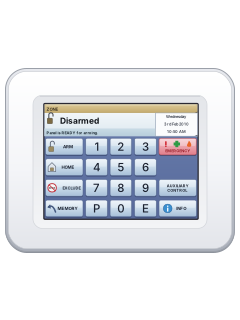
Touchscreen keypad

Ness Navigator touchscreen manuals
Start hereNess Navigator User ManualUser guide · 40 pages · 1.3 MBRead it nowD8x / D16x Navigator cheat sheet
Arm (away)ARMyour codeEorARME
- Close the doors and windows and keep out of rooms with motion detectors. The screen says when the panel is ready to arm.
- Touch [ARM], key in your code, then touch [E]. If your installer has turned on shortcut arming, [ARM] then [E] is enough.
- The screen shows Armed. Leave before the exit time runs out.
- 10 beeps as you arm: mains power off or a low backup battery. One long beep: already armed, or a wrong code.
- A 2-second siren at the end of the exit time: a zone was open and has been excluded. Disarm, check, and arm again.
Arm while homeHOMEyour codeEorHOMEE
- Home mode arms only the zones your installer chose, usually the doors and windows. The HOME button shows only if it's been set up.
- Touch [HOME], key in your code, then touch [E]. [HOME] then [E] may be enough, as with arming.
- The screen shows Home Mode.
- Your code and [E] stop an alarm in Home mode, but they also disarm. Arm Home mode again if you need it.
Disarmyour codeE
- Come in through your usual entry door. The keypad beeps as a reminder, if entry beeps are turned on.
- Key in your code, then touch [E], before the entry time ends. The screen shows Disarmed.
- Made a mistake? Touch [E] and start again. Five wrong codes set off the alarm.
- Disarming also stops the sirens. A flashing strobe outside means an alarm in the last 72 hours: check the memory.
- Under threat? If your installer turned on duress, key 5, 6, 8 or 9 before your code. It disarms and silently alerts your monitoring centre.
Bypass a zoneEXCLUDE
- Ness calls this Exclude. Each detector or door contact is a zone; an excluded zone can't set off the alarm.
- Touch [EXCLUDE]. A list of your zones opens.
- Touch a zone's name to exclude it; a Z shows beside it. Touch it again to put it back.
- Touch the X to close the list. EXCLUDE flashes while any zone is excluded.
- Excluded zones come back by themselves the next time you disarm.
Alarm memoryMEMORY
- A flashing MEMORY button means there has been an alarm. Memory opens only while the panel is disarmed.
- Touch [MEMORY]. The newest event shows in plain words, such as Alarm Zone 1 or Panic Alarm.
- Touch Next to go back through the last 30 events. The window closes after the last one.
- Looking at the memory stops MEMORY flashing.
Chime on or off0E
- Ness calls this Day Mode. With it on, an open day zone sounds for 2 seconds, like a shop door beeper.
- While disarmed, touch [0] then [E]. The screen shows Day Mode. Touch [0] then [E] again to turn it off.
- To choose the zones, touch [P] then [E] and touch each zone name; a sun symbol marks it. Touch the X to close.
- Your installer sets whether a day zone beeps the keypad, sounds the siren briefly or flashes the strobe.
Panic alarmEMERGENCYPANICorEMERGENCYPANICyour codeE
- Touch [EMERGENCY]: the Emergency Alarm window opens. Touch [PANIC] in it. MEDICAL and FIRE show there too if your installer has turned them on.
- If the panic shortcut isn't turned on, the screen then asks for your code and [E].
- Panic is set to sound the sirens, or to send a silent alarm to your monitoring centre.
- MEDICAL sends a medical alarm with no siren, if you're monitored. FIRE sounds the fire alarm sound and, if you're monitored, reports it.
- To cancel without sending an alarm, touch X before pressing PANIC or, if a code is requested, before entering it.
Change a codePmaster codeEP2user numberEnew codeEnew codeEPE
- While disarmed, touch [P], key in the master code (user 1), then touch [E]. User Program Mode opens.
- Touch [P], then 2 and the 2-digit user number (01 to 56), then [E]. User 2 is P 2 0 2 E. The current code shows.
- Key in the new code (3 to 6 digits) and touch [E], then key it in again and touch [E]. Don't start it with 0: that code won't work.
- To remove a code instead, touch Delete Code. Each code must be different from the others.
- Touch [P] then [E] to leave. Program mode also closes after 4 minutes with no touches.
Set the date and timePmaster codeESet Date & TimeHourtimeEPE
- While disarmed, touch [P], key in the master code, then touch [E]. Then touch Set Date & Time.
- Touch Day of Month, Month, Year, Hour or Minute, key in the new value, then touch [E]. The green bar shows it.
- Hours use the 24-hour clock (00 to 23); the year is 2 digits. The day of the week sets itself.
- Change the hour when daylight saving starts and ends.
- Touch [P] then [E] to leave program mode.
Trouble lights
- A system alarm shows where the clock usually is. Touch it to see what's wrong and what to do.
- Touch Next to see any others, then the X to close the window.
- Slow non-stop beeps warn that AutoTime, such as auto-arming, is due. Any key quiets them until the final minute.
- Your code alone, without E, puts the AutoTime event off for an hour, if your installer allows it.
- A siren while disarmed means a 24-hour zone went off, such as a siren or box tamper, or a panic button. Disarm, then call your installer.
Pages 12 and 13, 23, 38 of the Ness Navigator User ManualMains Power Fail Check the plug pack is plugged in and the power point is switched on Panel Battery Low The battery may be low after a mains failure, or old and due for replacing Dialler Communications Fail The dialler couldn't send an alarm message to your monitoring centre 10 beeps from the keypad Mains off, or a low panel or radio device battery. Check the plug pack is in and switched on; for the battery, call your installer 1 long beep Something you keyed wasn't accepted: touch [E] and try again Strobe light flashing There was an alarm in the last 72 hours: disarm, then check the memory TAMPER ALARM flashing The siren cover or the panel box has been tampered with: call your installer EXCLUDE flashing One or more zones are excluded
Why is my keypad beeping or showing a trouble light?
Most keypads beep or light up a trouble indicator when something needs attention, such as a low backup battery, a power cut or a lost phone or internet connection. Your user guide explains what each light or code means on your model. If it keeps happening, or you are not sure, call your installer or monitoring company.
All Ness Navigator touchscreen manuals
User guides 2
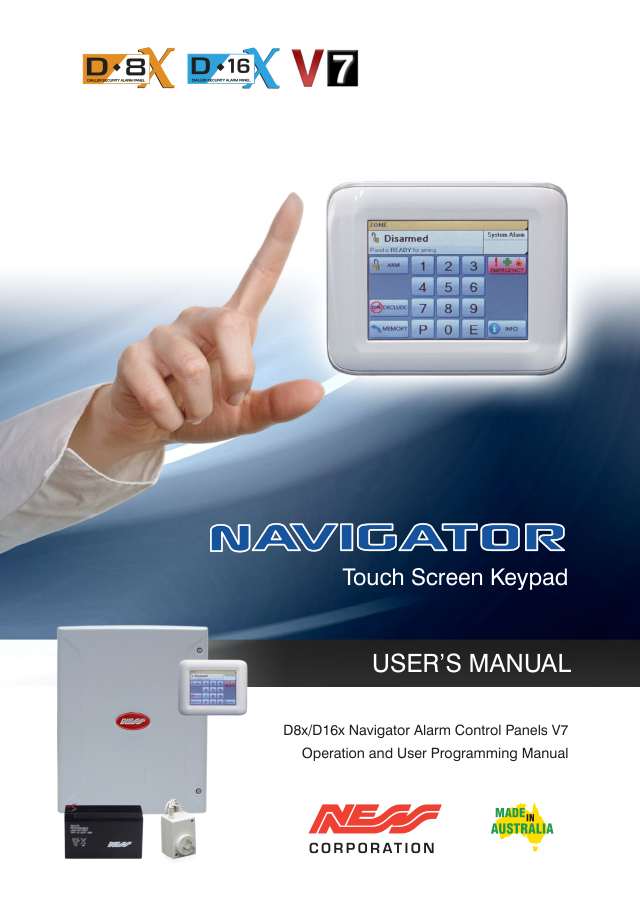
Installer manuals 2
Nothing here matches that.
Try a shorter search, or search every brand.
More Ness models
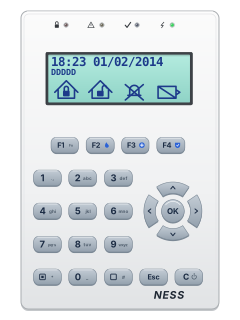
Is anyone watching your alarm?
An alarm that only makes a noise relies on someone hearing it. A monitored alarm reports to our A1 graded, NZSA approved control room, watched 24/7 by a team that is New Zealand owned and operated. We can monitor most existing alarms, so you may not need a new one. Thinking about a new alarm or security cameras? Ask us for a quote.
Prefer to talk now? Call us on 0800 339 999.
Home: alarm monitoringBusiness: business monitoringInstaller: bureau monitoring

Manuals are the property of their manufacturers and are provided for reference only; their inclusion here does not imply any endorsement by the manufacturer.