
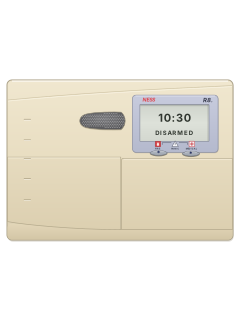
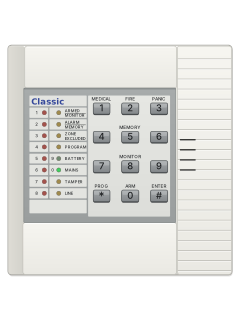
All-in-one control panel (keypad behind the door)

Ness R8 manuals
Start hereNess R8 User Manual rev2User guide · 32 pages · 824 KBRead it nowKeypad cheat sheet
Arm (away)ARMEorARMyour codeE
- Close the doors and windows. The READY tick shows when the panel is ready to arm.
- Press ARM, then E (the ENTER key). If your installer has turned that shortcut off, press ARM, your code, then E.
- Three quick beeps confirm it, and the ARMED icon shows. Leave before the exit time ends (60 seconds unless changed); three beeps mark its end.
- A quiet 2-second siren burst at the end of exit time means an open zone was left out. Come back, disarm, check it, then arm again.
- With a Radio Key, press ON once.
Arm while homeMONITOREorMONITORyour codeE
- Ness calls this Monitor mode. Only the zones your installer set for it are armed, usually doors and windows.
- With the panel disarmed, press MONITOR, then E. If your installer turned that shortcut off, press MONITOR, your code, then E.
- The MONITOR icon comes on. Entry and exit times work as usual.
- If an alarm goes off, your code then E silences it and disarms, so set Monitor mode again if you need it.
- With a Radio Key, press ON twice within 4 seconds.
Disarmyour codeE
- Come in through your usual entry door. The keypad beeps non-stop to remind you.
- Key in your code, then press E, before the entry time runs out (20 seconds unless changed).
- Made a mistake? Press E and try again. Too many wrong codes set off an alarm.
- Your code then E also stops the sirens and a flashing strobe after an alarm. A Radio Key's OFF button does the same.
- If your installer has turned on duress and you are monitored, 9 before your code, then E, disarms and sends a silent alarm.
Bypass a zoneEXCLUDEEzoneEEorEXCLUDEyour codeEzoneEE
- Ness calls this excluding. Each detector or door contact is a zone; an excluded zone can't cause an alarm.
- With the panel disarmed, press EXCLUDE, then E (or EXCLUDE, your code, then E). The EXCLUDE icon comes on.
- Key in the zone number (1 to 8), then E. That zone number lights up. Repeat for other zones.
- Press E to finish. The EXCLUDE icon flashes, armed or not, until you next disarm.
- Excluded zones come back when you next disarm. To bring one back sooner, key it in the same way: its number goes off.
Alarm memoryMEMORYEthenMEMORYorMEMORYyour codeEthenMEMORY
- A flashing MEMORY icon means there has been an alarm. Memory only opens while the panel is disarmed.
- Press MEMORY, then E (or MEMORY, your code, then E). The MEMORY icon comes on.
- Press MEMORY to see the newest event, then again for each older one, up to the last 20.
- The icons show what each event was (see the table). Press E to leave; the MEMORY icon stops flashing.
Pages 7, 18 and 19 of the Ness R8 User Manual rev2A zone number That zone went into alarm ARMED The panel was armed Nothing lit The panel was disarmed EXCLUDE on its own Panic, medical or fire alarm from the panel's keypad EXCLUDE and a zone number That zone was left out automatically when arming MAINS or BATTERY Mains power failed, or the backup battery was low LINE Phone line fault, or a call to the monitoring centre failed TAMPER Tamper alarm, such as the panel or siren cover; with PROGRAM, too many wrong codes Panic alarmhold*+*
- Hold both star (*) keys together for 2 seconds. Keypad panic is on unless your installer turned it off.
- The sirens sound. If you are monitored, a panic report goes to your monitoring centre, if your installer set that up.
- Fire: hold the left star key (FIRE) for 2 seconds. Medical: hold the right star key (MEDICAL). Both work only if your installer turned them on.
- Medical is mainly a report to your monitoring centre; the keypad gives 8 quick beeps.
- Key in your code, then E, to stop the sirens. Panic doesn't work in Program, Memory or Exclude mode.
Change a codePmaster codeEP11Enew codeEnew codeEPE
- P is the PROGRAM key. Press P, the master code, then E. The PROGRAM icon comes on.
- Press P, the code's option number, then E: 11 for code 1 (the master code), 12 for code 2, up to 25 for code 15.
- Key in the new code (3 to 6 digits; one starting with 0 won't work) and E: one beep. Then the same code again and E: three beeps.
- To delete a code, press MEMORY then E in place of the new code. The master code can't be deleted; this resets it to the factory code.
- Press P then E to leave Program mode. It also closes itself after 4 minutes with no key pressed.
Trouble lights
- 8 quick beeps mean low battery, mains power off, or a medical alarm.
- A fault keeps the keypad beeping until you press E.
- When the READY tick is off, a zone is open or there is a system fault, so the panel isn't ready to arm.
Pages 6 and 7 of the Ness R8 User Manual rev2Pages 11, 13 to 15 of the Ness R8 Installer Manual rev2.5MAINS flashing Mains power is off BATTERY flashing The panel's backup battery is low RADIO flashing A wireless device has a low battery or another radio fault; the number shows which one LINE flashing Phone line fault, or the panel couldn't reach the monitoring centre TAMPER flashing Tamper alarm, such as the panel or siren cover being opened EXCLUDE flashing Zones are excluded, or a keypad panic has gone off MEMORY flashing New alarms in memory: view them to clear it A zone number flashing That zone went into alarm
Why is my keypad beeping or showing a trouble light?
Most keypads beep or light up a trouble indicator when something needs attention, such as a low backup battery, a power cut or a lost phone or internet connection. Your user guide explains what each light or code means on your model. If it keeps happening, or you are not sure, call your installer or monitoring company.
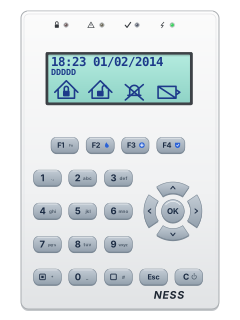
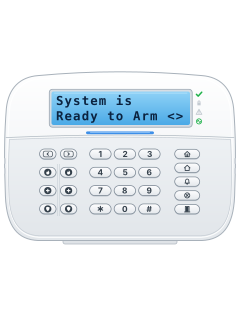
More Ness models
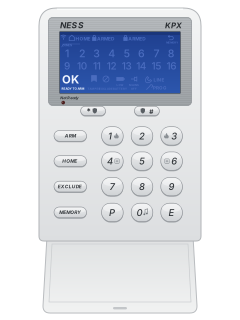
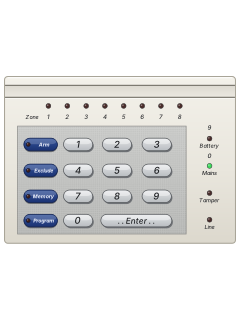
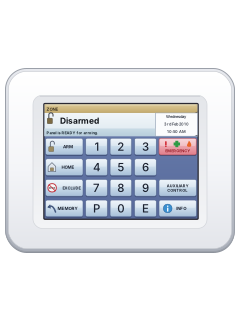
Is anyone watching your alarm?
An alarm that only makes a noise relies on someone hearing it. A monitored alarm reports to our A1 graded, NZSA approved control room, watched 24/7 by a team that is New Zealand owned and operated. We can monitor most existing alarms, so you may not need a new one. Thinking about a new alarm or security cameras? Ask us for a quote.
Prefer to talk now? Call us on 0800 339 999.
Home: alarm monitoringBusiness: business monitoringInstaller: bureau monitoring

Manuals are the property of their manufacturers and are provided for reference only; their inclusion here does not imply any endorsement by the manufacturer.