
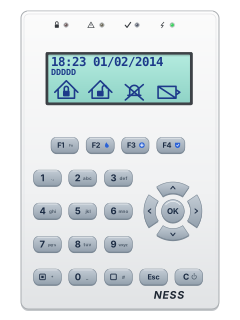
SmartLiving (Inim) Joy/GR, Joy/MAX and nCode/G keypads

Ness Smart Living manuals
Start hereSmart Living Control Panels User ManualUser guide · 58 pages · 8.8 MBRead it nowKeypad cheat sheet
Arm (away)your codeOKthenOKthenOK
- Your installer may have set up the F1 to F4 keys as shortcuts: the icons along the bottom of the display show what each one does.
- Or key in your PIN and press OK. Pick Arm/Disarm op. with the up and down arrows, then press OK.
- Choose an area (partition) with the left and right arrows, and Away with the up and down arrows. Set any other areas, then press OK.
- If a zone is open, the keypad lists it first. Close it: arming anyway sets off an instant alarm from that zone.
- Unless exit beeps are turned off, the keypad repeats 3 beeps and a 5-second pause through the exit time, 4 beeps in the last 20 seconds. Armed areas show A.
Arm while homeyour codeOKthenOKthenOK
- SmartLiving calls this Stay: only the perimeter zones (doors and windows) are armed, so you can move about inside.
- Key in your PIN and press OK. Pick Arm/Disarm op. with the up and down arrows, then press OK.
- Choose the area with the left and right arrows, pick Stay with the up and down arrows, then press OK. The area shows S.
- If the list also offers Instant, it arms the same zones with no entry delay: an opened door sets off the alarm at once. The area shows I.
Disarmyour codeOKthenOKthenOK
- Come in by your usual entry door. Unless entry beeps are turned off, the keypad repeats 8 beeps and a 5-second pause while the entry time runs.
- While the entry time runs, keying in your PIN disarms the areas your code and this keypad share straight away.
- Otherwise key in your PIN, press OK, pick Arm/Disarm op. and press OK. Set each area to Disarm with the arrows, then OK.
- A disarmed area shows D on the display.
Bypass a zoneyour codeOKthenOKthenOKthenOK#
- Each detector or door contact is a zone. SmartLiving bypasses a zone by deactivating it: a deactivated zone can't cause an alarm.
- Key in your PIN and press OK. Pick Activations with the up and down arrows and press OK, then Zones and OK.
- Pick the zone with the up and down arrows and press OK.
- Press # (DISABLE) to bypass it. Press * (ENABLE) to put it back.
- The yellow triangle light flashes while a zone is bypassed.
Alarm memoryyour codeOKthenOKthenOK
- After an alarm, the red padlock light flashes and the top line of the display shows the zones involved, one at a time.
- To see the list: key in your PIN, press OK, pick View and press OK, then Alarms log and OK. Scroll with the up and down arrows.
- To clear the memory: PIN, OK, pick Manage alarms and OK, then DeleteAlarm mem. and OK. This also stops the sirens.
- Stop alarms, in the same list, silences the sirens and keeps the memory.
Panic alarmholdF1+F4
- For police, hold F1 and F4 together for 3 seconds, and wait for the beep that confirms it.
- For fire, hold F1 and F2 together; for an ambulance, F1 and F3. Hold each pair for 3 seconds.
- The keypad lights and display don't show it. What happens next, such as sirens or calls to your monitoring company, depends on your installer's setup.
Change a codeyour codeOKthenOKthenOKnew codeOKnew codeOK
- Key in your PIN and press OK. Pick Change PIN with the up and down arrows, then press OK.
- Pick the code to change with the arrows and press OK: your own, or one ranked below yours.
- Key in the new PIN (4, 5 or 6 digits) and press OK. Key it in again and press OK to save.
- Change the first user code from its factory setting to your own PIN straight away.
Set the date and timeyour codeOKthenOKthenOK
- Key in your PIN and press OK. Pick Set date/time with the up and down arrows, then press OK.
- Move between the hour, minute and date fields with the left and right arrows.
- Change the selected field with the up and down arrows.
- Press OK to save.
Trouble lightsyour codeOKthenOKthenOK
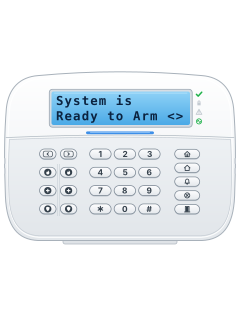
- Four lights on the keypad show how the system is (see the table).
- To see what a fault is: key in your PIN, press OK, pick View and press OK, then Faults and OK.
Pages 14, 34, 57 of the Smart Living Control Panels User ManualRed padlock on At least one area is armed Red padlock flashing An alarm or tamper is in memory Yellow triangle on There is a fault: look under View, Faults Blue tick on Every zone is closed: ready to arm Blue tick off A zone is open Green lightning off Mains power has failed Low battery (under Faults) The panel's backup battery is nearly flat or disconnected Tel. line down (under Faults) Fault on the phone line
Why is my keypad beeping or showing a trouble light?
Most keypads beep or light up a trouble indicator when something needs attention, such as a low backup battery, a power cut or a lost phone or internet connection. Your user guide explains what each light or code means on your model. If it keeps happening, or you are not sure, call your installer or monitoring company.
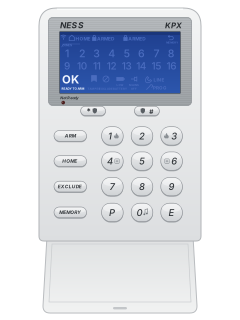
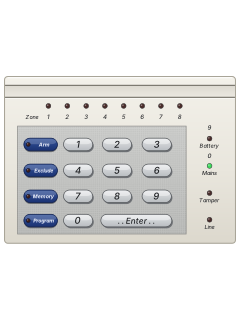
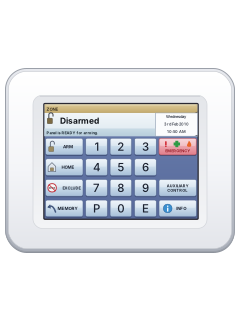
More Ness models
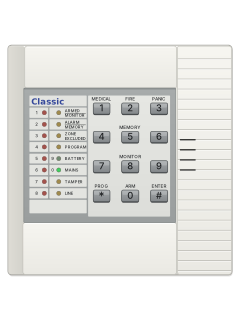
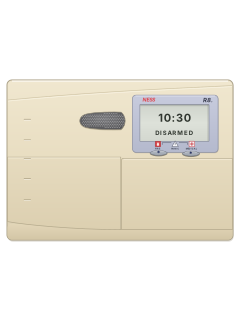
Is anyone watching your alarm?
An alarm that only makes a noise relies on someone hearing it. A monitored alarm reports to our A1 graded, NZSA approved control room, watched 24/7 by a team that is New Zealand owned and operated. We can monitor most existing alarms, so you may not need a new one. Thinking about a new alarm or security cameras? Ask us for a quote.
Prefer to talk now? Call us on 0800 339 999.
Home: alarm monitoringBusiness: business monitoringInstaller: bureau monitoring

Manuals are the property of their manufacturers and are provided for reference only; their inclusion here does not imply any endorsement by the manufacturer.